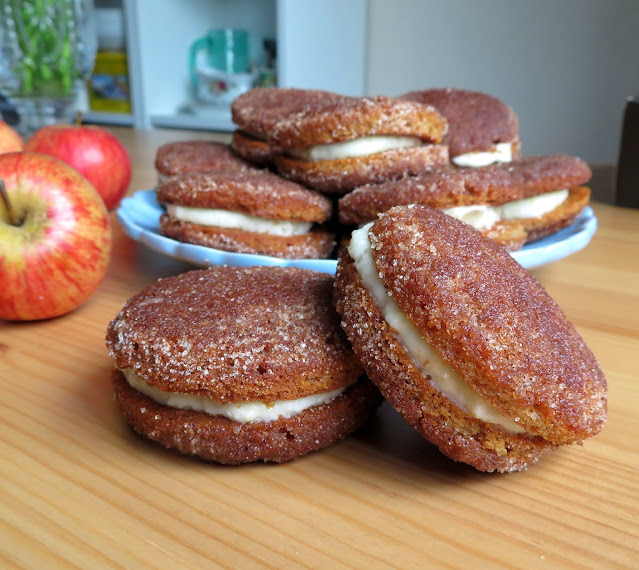
Apple Cider Donut Whoopie Pies
Once baked they are coated with melted butter. They are then rolled in a spiced sugar to give them a lovely crunchy coating.
Again the spices are nutmeg and cinnamon. Very nice I have to say.
I chose to fill them with a cream cheese frosting. You don't need a filling that is overly sweet when you have all that sugar on the outsides.
You want something which is rich and luxurious, but not too sugary. This fits the bill perfectly.
I used my whoopie pie pan to bake these. I have to say I am not always very happy with the way they come out using this pan.
I always end up having to trim the edges. They look alright, but not quite as they would just baked on parchment paper on a baking sheet.
I ended up having to bake these twice. I was much happier with my first set of photos. I thought I had taken them off the camera onto my photo editing program.
I am pretty sure I had, because I then deleted them from off my camera card. So today when I went to edit them, uh oh . . . no photos.
And so I had to bake them all over again today! Not a hardship really. These are so good. In fact they are amazingly delicious!
And so today I now have more to give them away. I don't think my next door neighbour will mind. She is usually the recipient of my baked things.
I can tell you nobody has ever complained! They are always very happy when I bring them a treat.
They say joy shared is doubled. I have to say that baking shared is joy shared. Its a simple thing and means a lot to people to know you care enough to share with them little treats like these.
Anyways, I do hope that you will bake these and then enjoy them. They really are very good. Scrumdiddlyumptious I have to say.
Scrumpdiddlyumptious and incredibly moreish! Trust me. Have I ever lied before? 👍👍👍
Apple Cider Donut Whoopie Pies

Ingredients
- 2 cups (480ml) sweet apple cider or cloudy apple juice
- 2 cups (280g) all purpose (plain) flour
- 1 1/2 tsp baking soda
- 1 tsp ground cinnamon
- 1 tsp ground nutmeg
- pinch each powdered cloves and ginger
- 1/2 tsp fine sea salt
- 1/2 cup (120g) butter
- 1 cup (200g) soft light brown sugar packed
- 1 large free range egg
- 1 tsp vanilla
- 1/2 cup (120ml) buttermilk
- 2 1/2 TBS butter, at room temperature
- 4 TBS full fat cream cheese, at room temperature
- few drops vanilla
- 1 cup (130g) sifted icing sugar to give you the right consistency
- 3/4 cup (150g) granulated sugar
- 1 TBS ground cinnamon
- 1 TBS ground nutmeg
- 4 TBS melted butter
Instructions
- You will need to reduce the apple juice before beginning. Put it into a very large beaker and cook it on high in the microwave for 15 minutes until it reduces to 1/2 cup (120ml). (Alternately you can do this in a saucepan on the stove, boiling it for abou 10 minutes.) Set aside to cool.
- Preheat the oven to 180*C/350*F/gas mark 4. Line two baking sheets with baking paper, or spray two non-stick whoopie pie pans really well with baking spray. Set aside.
- Sift the flour, soda, cinnamon, nutmeg, cloves, ginger and salt together in a bowl.
- Cream the butter and brown sugar together in another bowl until light and well combined. Beat in the egg ad vanilla. Mix on low speed with an eletric mixer while alternately adding the buttermilk, flour and reduced apple juice. Stop and scrape the sides of the bowl as needed.
- Spoon heaping dessert-spoonfuls (about 1/4 cup) of the batter into the holes of your whoopie pie tins or roughly 3 inches apart on your lined baking sheets.
- Bake for 12 to 15 minutes or until puffed and golden brown. A toothpick inserted in the centre of one should come out clean. Transfer to a wire rack to cool completely.
- Mix the granulated sugar, cinnamon and nutmeg together in a bowl. Brush the top of each whoopie pie cake with some melted butter and then roll it in the sugar mixture to coat. Set aside until all are done.
- Beat all of the icing ingredients together until smooth and creamy. Sandwich two sugar coated cakes together with some of the icing, spreading it on the flat side of one and topping with the flat side of the other.
- Store in an airtight container until ready to serve. You can wrap each one individually in plastic cling film if you wish.


